Energy bar with peanuts, flax seeds and jaggery


Now that the older one goes to “big boy school”, I need to plan ahead for his lunch box and also his “van snack”. My hyper active boy gets super hungry on his way back from school and a hungry little boy makes a cranky little boy. So I send him a little something to tide over the hunger pangs till he can get a solid meal once he is home. Packing healthy fun snacks is always a challenge but thankfully both my boys seem to have a varied palette and enjoy different kinds of food. I got the idea for this energy bar from the brand “Yoga bar” that is available in health stores in India. They have a chocolate and peanut bar which I derived inspiration from. It satisfies the chocoholic in me and my son 🙂

The quantities I mention can be easily doubles or tripled. This is a very forgiving or self correcting recipe 🙂 You can add or substitute the ingredients with all kinds of nuts( walnuts, cashew nuts, almonds), different kinds of seeds ( sunflower, flax, melon etc) use dates or honey instead of jaggery.

IMG_3172

Ingredients: Makes 10-12 2″ inch bars

1 cup peanut

1/2 cup almonds

1/2 cup flax seeds

Vanilla extract 1 tsp

1/2 cup jaggery (add more based on your taste)

1 tbsp good quality cocoa powder

On low heat dry roast the peanuts till they are golden brown in color and you start getting the nutty aroma. Next dry roast the almonds. Dry roast the flax seeds till they start crackling. Dry roasting is the key to getting good tasting energy bars. Make sure you roast them on low flame and take care not to burn the nuts.

Next add all the ingredients into a blender or food processor and blend until the mixture comes together. You should be able to make balls which won’t crumble.

Spread the mixture onto a plate and press down with your fingers to even out the surface. Using a pizza cutter or a sharp knife, make horizontal and vertical cuts.

Refrigerate for a couple of hours. To get the pieces out, invert the contents onto another plate carefully.


Avial


Avial is traditionally a Kerala recipe made especially made as part of the Onam sadya. However it is also served as part of banana leaf meals in Tambrahms functions. The beauty of this recipe of the simplicity of ingredients. It uses specific veggies which don’t have strong flavor and the star of the dish is the generous use of coconut oil. That’s what sets this dish apart.

DSC_0439

Ingredients : Serves 6-8

1/2 cup each of potato, carrot, beans, peas, raw plantain, yam (Suran or Suvarna gedde), sweet pumpkin, ash gourd cut into 1/4″ long pieces.

1/2 cup of freshly grated coconut

1 teaspoon Cumin seeds

2-3 green chilies

1 cup of yogurt

1/4 cup coconut oil ( *NOT* the organic odorless kind found in health food stores!)

1 sprig of curry leaves

1 tablespoon tamarind paste

Salt to taste

1 cup of water

DSC_0419

First grind the coconut, cumin seeds and green chilies to a coarse paste.

In a wide bottomed vessel, bring the water to a simmer and add the tamarind paste. Now add the yam/suran and let it cook for a couple of minutes. Next put the beans, drumstick and cook for 2 minutes. Next add carrots, potato, plantain and ash gourd. Now add the coconut paste and salt and let it simmer for two minutes. Lastly add the peas and the sweet potato and simmer it till all the vegetables are cooked making sure they are not over-cooked. Add the curry leaves as well.

Since the cooking time for different vegetables varies, it is important to cook them in the order mentioned above.

Take it off the heat and mix well with coconut oil and yogurt. Serve with rice and any other spicy curry or sambar as a side dish!

DSC_0438

Sriracha kissed almonds and Avocado sandwich


Sriracha kissed almonds and Avocado sandwich

When two exotic ingredients like Sriracha sauce and avocado get together in a sandwich, you know you cannot go wrong with it. What a treat to your taste buds…. the bold spicy flavor of Sriracha, the nutty taste of almonds and to balance it all, the creamy texture of avocado! Try this for a week end breakfast or an easy mid week dinner. It is perfect!

almonds swich5 swich3 swich2 swich1

Ingredients:

1 cup of raw almonds

2 tbsp of Sriracha sauce

1 tbsp of Olive oil

Heat the oil in a small pan. Add the almonds in and gently begin to roast. About halfway through ( 5-6 mins) when the almonds are getting toasty, slowly add in the Sriracha sauce, watching carefully to not drown the nuts in the sauce or they will get too soggy. They just need to get a gentle drizzle of the sauce. Roast for another 5-6 minutes. Let it cool and store it for later use for a multitude of purposes!

For the sandwich, all you need is to mash up some avocado, drizzle salt and pepper. Toast the bread (with butter to a golden brown color is even better!). Spread the avocado evenly onto both slices, slide in the toasted almonds, add some extra fresh pepper if you can take the extra dash of heat. Enjoy!

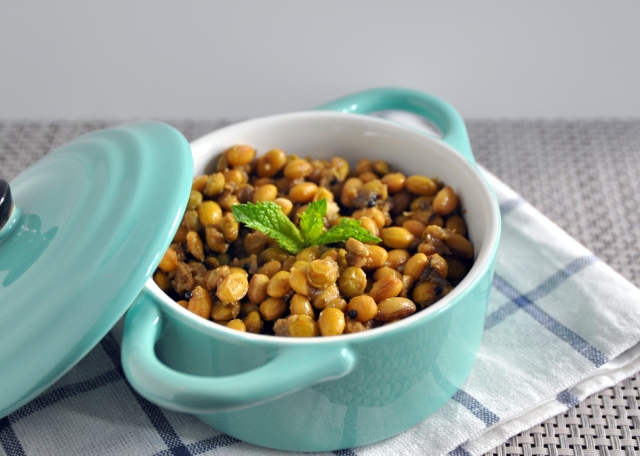
Ambode/Kadle beLe vade


Ambode(deep-fried chana dal patties) is a quintessential accompaniment in a traditional iyengar meal for any rice dishes like puLiyogre, mango rice etc.I had been planning to make it for a long time but the thought of deep-frying, had been putting me off 😉 With an Ugadi potluck planned, it seemed like the perfect opportunity to make this,  with step by step instructions from mom who makes the best ambode!

As with any Indian dish, this can be made with a lot of variations. I personally like to make it with mint. You can also use cilantro, dill (sappsige soppu) if you like the strong aroma, onions can be added( being a tam-brahm, I consider it a sacrilege to add onions to this dish :D). The trick to making crispy ambode is to not let the chana dal  soak longer, one hour of soak time makes the crispiest ambode!

Amobode

Ingredients : Serves 8-10

3 cups chana dal. (Soak for an hour)

5-6 red chilies ( Use half bydagi and half guntur)

1 packed cup mint leaves, washed and chopped finely.

1 pinch hing

1/2 teaspoon turmeric

2 table spoons shredded fresh coconut

2 table spoons dry coconut (koppari)

Salt to taste

1 tablespoon ghee (optional but recommended)

3/4 – 1 liter oil for frying

In a blender, finely powder the chilies, fresh and dry coconut. Add turmeric, salt and hing. Next drain the chana dal completely using a sieve and transfer it to the blender. Using the pulse option of the blender, pulse the mixture until the chana dal is coarsely ground. Be sure to not grind to a paste, coarse ground dough adds to the crispiness.

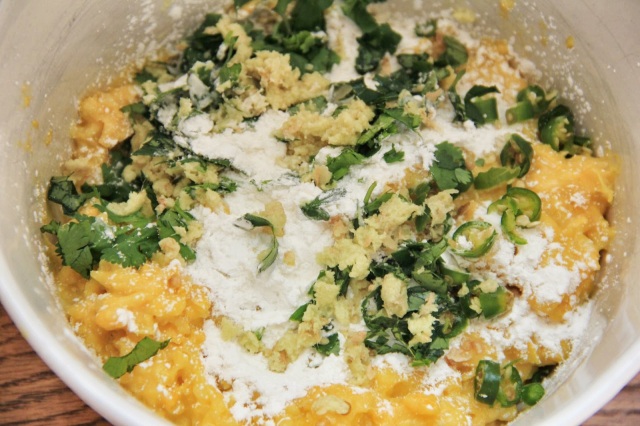
Transfer the contents to a mixing bowl and then add the chopped mint leaves, and ghee. Mix thoroughly.

Make lime size balls out of the dough and keep aside.

When the oil in the frying pan is hot and the stove is on medium heat, take the lime size ball of dough and flatten it out into a patty,  making sure the patty is 1/4″ in thickness. Add about 5-6 patties at a time and fry on both sides till golden brown.  Do not fry them on high heat, this makes the outside get brown while the dough on the inside remains under-cooked.

Serve with a full course of tam-brahm meal ;). It also pairs well with ketchup or mint chutney.

AvarekaaLu palya/usli


Avarekai is apparently known as flat beans(I had to google for it!) in English and more popularly known as Surati Papdi in Indian stores in the US. Avarekai always evokes memories of my grandpa and also the erstwhile winters of Bangalore. If you are wondering why I chose the word erstwhile winters, it is a topic for another blog post :). Grandpa loved any dish made out of avarekaaLu! He would bring 2-3 kgs of avarekai from the market and leave it out in the open during the cool winter nights. This would make the avarekaaLu have more “sogadu”. To loosely translate the term into english, it means having a nice fragrance and an oily sheen to the beans. Then came the laborious process of shell the avarkaaLu. Next step was to separate the tender ones which would be used for making akki rotti. The big ones would be used to make saaru, upma etc.

Seeing as the love for avarekaaLu has been passed on through the next generations, I love using them in all kinds of dishes. Once such dish that I learnt from mother-in-law is the avarekai palya or usli. This pairs beautifully with plain akki rotti, puri or if you are little health freak like me, it goes well with chapatis too. I have to make do with the frozen variety here in the US though!

avarekaiusli

Ingredients: Serves 3-4

1 bag of frozen avarekaaLu or fresh beans from about 1.5 kgs of avarekaai

1 medium bunch methi leaves, chopped (optional but recommended)

2 teaspoons jeera powder

2 teaspoon mustard seeds

2-3 green chillies

1-2 cloves garlic

1 inch ginger

Onion 1 small chopped

Coconut 1/2 cup

Cilantro 1/2 cup chopped

Oil – 2-3 tablespoons

Salt to taste

Grind 1 tsp of jeera, 1 tsp mustard garlic, ginger, green chilli, coconut and cilantro to a fine paste with little water.
In a pressure cooker, heat oil, add mustard and jeera seeds and wait till the mustard splutters. Next add onion and saute.  Add the paste and saute for a minute. Add methi leaves and saute. Next add avarkaaLu, salt and little water if needed. Pressure cook for 3 whistles. Serve with plain akki rotti, puri or chapati.

Corn Pakodas


Corn pakodas ( Corn fritters)

Now that winter has arrived and looks like it is here to stay, it’s time to curl up on the couch and start enjoying chai-pakoda inside! There is something about pakodas that no matter what vegetable you put in them, they turn out delicious. Since my kids think corn is the best vegetable ever, I end up making these a lot. This is my mom’s version and is simple, easy to make and will leave you licking your fingers!

final2 (1)

Ingredients: Serves 4

3 cups of corn

Cilantro- 1 small bunch

2-3 string sof curry leaves

2-3 green chillies- finely chopped

2” fresh ginger

2 tbsp corn flour

Salt to taste

Oil for deep frying

corn (1)

hittu (1)

hitttu2 (1)

final1 (1)

Method:

If you are using frozen corn, thaw it for an hour or so and drain out the water. Then add salt and cover and cook in the microwave for 2-3 minutes till the corn becomes soft. Again drain out any excess water. In a blender, give the cooked corn a gentle whirr so each one roughly splits into 4 parts. You can do the same in a food processor, but go easy on the blades. The point is you want the dough to be gritty in nature. Add 2-3 tbsp corn flour to make into into a dripping consistency. Then add in the chopped green chillies, chopped curry leaves, cilantroe and a generous dash of fresh grated ginger and salt to taste.

In a frying pan, heat oil and drop in small lobules of the dough. Fry till golden brown.

Serve hot. These golden beauties are best enjoyed with Maggie tom-chi sauce of course!

Corn- Pomegranate Kosambari


Kosambari is a super healthy South Indian side dish that usually uses a raw vegetable (such as cucumber/carrot) and a lentil (moong or chana daal) as it’s main ingredients. It is that crunchy and perfect balance of salt, sour and spice often coming from lemon juice and slit green chillies. Try this unconventional version without the lentil, but with plenty of colored vegetables ( loaded with the much hyped about anti-oxidants), corn for the crunch, pepper for the spice, raw mango for the sour and yes, to a add a twist, pomegranate kernels for sweet! The secret to the whole recipe is chopping all the veggies as tiny and uniform as you can. Considering how healthy and tasty it is, you won’t guilt yourself going for the seconds on this one.

IMG_2676_1024 IMG_2680

Ingredients:

Red, yellow and orange peppers – Finely evenly chopped to corn kernel size

Corn- 1 cup ( Thaw the frozen corn for an hour)

Pomegranate kernels – 1 cup

Raw mango – ½ cup finely chopped

Cilantro, shredded coconut , mustard seeds and oil for garnishing ( optional)

Salt to taste

Fresh ground pepper powder ½ tbsp.

Toss in all the diced veggies, pomegranate seeds, corn and cilantro in a mixing bowl. Splutter ½ tbsp of mustard seeds in ½ tbsp. of oil, Add salt, pepper powder and additional fresh lemon juice if needed. Enjoy your full week’s worth of antioxidants!!

IMG_2035

Green apple pickle


pic1

Green apple pickle

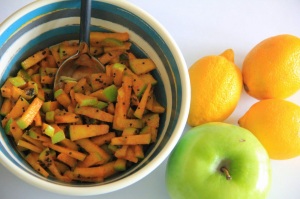
Ever crave for instant mango pickle, but realize it is not the season for raw mangoes?? Here’s one recipe that you can use as a substitute for raw mango pickle and can be made instantaneously since green apples are ubiquitous throughout the year. They taste almost as good as raw mango. This comes very close in taste to “dhedeer uppinkai” that we all love at South Indian weddings.

Ingredients:

Green apple- cut into 1” thin pieces

1 tbsp each of mustard powder, methi (fenugreek)powder, turmeric powder, red chilli powder

Fresh squeezed lemon juice from 1-2 medium sized lemons

Oil, 1 tsp mustard seeds and pinch of hing ( asafoetida) for tempering

Salt to taste.

Cut the green apple into 1”pieces. Add all the above ingredients except salt and let it stand overnight in the refrigerator. Few hours before you are ready to serve, temper with mustard seeds in oil and add salt and lemon juice per taste. If you need extra spice, fine chop some green chillies and add them into the oil when you temper the mustard seeds. You can stock up the excess, refrigerate it and use it for upto 1 week.

pic2

2-bite marshmallow pops!


If you are ever hosting a baby/bridal shower and need to make a quick party favor, try this one. Even if you are not, and want to engage your kids in a fun family culinary session this summer, this idea still works great. Takes 20 minutes to make a batch of 20 and uses simple ingredients that live in the pantries of most households with kids. Add your own wrapping touches and you ‘ll have one of those fancy hand-made-personalized gift type deals, for a fraction of cost! Tried this for a shower recently and these sweet treats a hit with kids and adults alike.

You will need:

Marshmallows ( Giant ones are better)

Chocolate chips ( meltable semi sweet or dark chocolate chips, I love the Ghirardelli dark ones!)

Sticks ( The ones from the craft isle or small straws will also work)

Rainbow sprinkles ( The best about this recipe per my 7 yr old!)


1 2 3 5 6 7

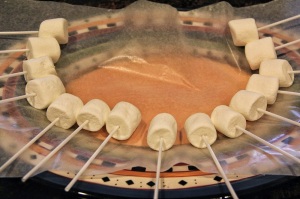
Gently pierce a giant marshmallow into the end of a stick/straw. While you are doing that, get a double boiler (with steam) started to melt the chocolate chips in. As the chocolate melts, dip the marshmallow half way through into the molten goodness, spinning it gently so all sides are evenly coated. Roll the chocolate covered mallow in the rainbow sprinkles. You could use a block of thermocol to make the sticks stand upright, if you don’t have one on hand, just lay them on wax paper and let  it dry for 10-15 min. Have fun dipping and drying! Wrap them in your own fancy way, add favor tags etc, etc.. or enjoy as is!!

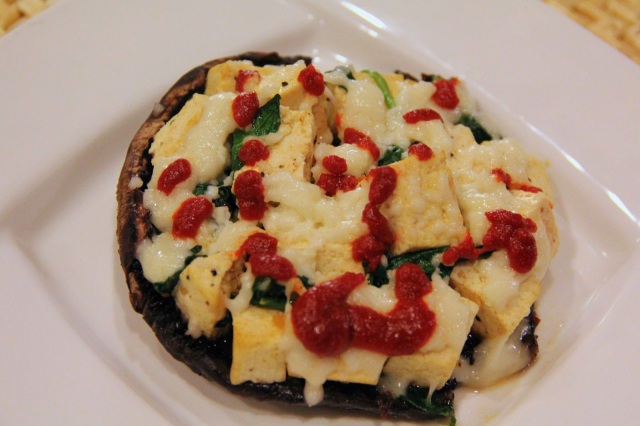
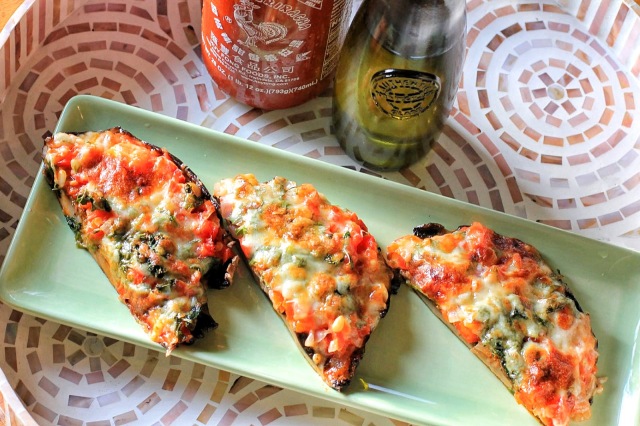
Grilled bellas with Sriracha…aah!!


Grilled bellas with Sriracha…aah!!!

If you tired of seeing fried appetizers at every party ( like me☺)here’s a healthy one to kick start your next party.

Good part about this recipe is, you can use your imagination to create any kind of filling that goes into the mushrooms.

Even better part is this recipe takes the best hot sauce in the world, Sriracha! Just load it up with cheese and the savoury Sriracha sauce and all is golden!.

Ingredients: ( Serves 6-8)

Portobello mushrooms about 4

Topping#1: Tofu (extra firm) 1 block, Spinach 1 cup ,Seasoning ( Italian herb or any generic seasoning)

Topping #2: 1 cup Roasted red peppers, 1 cup chopped onions, toasted pine nuts and handful cilantro

Sriracha hot sauce ( any hot sauce will do, but no sauce tickles your taste buds like this one!!)

Mozzarella cheese 1 cup

Oilve oil spray

Method:

Wash the mushrooms, trim the stem and scoop out the undersurface clean with a spoon. In a pan, sautee the tofu, spinach with the seasoning and salt added. Then, gently fill in the tofu and spinach into the mushroom till the cleaned out brown bed is covered.

Instead you can also lightly sautee finely chopped red bell peppers and onions and load them into the mushroom. You can sprinkle some toasted pine nuts and cilantro too.

If you are feeling lazy (like I was the first time I made them) you can just spray olive oil and then add dollops of sauce directly from the bottle onto the loaded mushroom. If you are in a more energetic mood ( like I was when made them for the second time), using a basting brush to coat a mix of olive oil and hot sauce onto neatly halved mushrooms. Finally top the mushrooms with cheese, generously.

If you are in a hurry, you can directly bake them in the oven at 350 deg for about 30 min. If you happen to have sometime on hand, the better way is to wrap them real tight in plastic wrap and refrigerate for about 4 hrs prior to baking. The latter method is better as the toppings have more time to soak in the oil and sauce, adding more flavor. Add a dash of extra Sriracha sauce on the side while serving.

Tip: If your mushrooms leave out a lot of water like mine did, gently soak up the excess water using the ever faithful super absorbent Bounty tissue!


IMG_9948


tofu1


IMG_9962

IMG_2110

IMG_1819


IMG_2124

IMG_2140